Tutorial
The Quickstart runs the demo template. This tutorial adds a small CRM: companies, contacts linked to them, a dashboard, and role-based access. Build the company and contact screens first, then add the dashboard and test a restricted role.
You need a running project from the Quickstart (or Project setup) with the database up (Installation). Redis is optional for this single-instance tutorial. Add the files below alongside the template's existing files, and merge the entry-point imports and schema registration into its lifecycle rather than replacing it. Everything below is backend TypeScript — no Vue.
For a smaller first step, run the Welcome page example and check its Your first DMS page placeholder before adding the CRM below. The screenshots here run these examples together on a fresh database; they do not show the template's unrelated demo application.
What you'll build
The same contact appears in three places: a database row, a controller's field definitions, and a table with an edit form. The controller connects the stored data to the UI:
┌─────────────────┐     ┌─────────────────┐     ┌───────────────────┐
│ Company /       │────▶│ DataController  │────▶│ TableView page    │
│ Contact models  │     │ fields + routes │     │ list + edit form  │
└─────────────────┘     └─────────────────┘     └───────────────────┘
Keep this file map nearby as you work. The CRM is separate from the template's seeded demo application.
src/
  db/crm.ts           # two tables + models: Company, Contact
  data-api/crm.ts     # two DataControllers: the data shape and CRUD rules
  pages/crm.ts        # a CRM category, two table pages, a dashboard page
  routes/crm-stats.ts # the KPI route behind the dashboard
  index.ts            # side-effect imports + schema registration
Declare the tables and models
Tables, models, and the @Field/@Relation decorators are AntelopeJS concepts — the framework's Database guide is their reference if anything in this step is unfamiliar. The point to notice here: Contact.companyId carries @Relation({ to: () => Company }), so the schema itself records the link between the two tables.
import {
  BasicDataModel,
  CreationTime,
  Field,
  Index,
  RegisterTable,
  Relation,
  Table,
  UpdateTime,
} from "@antelopejs/interface-database-decorators";

export const CRM_SCHEMA = "crm";

@RegisterTable("crm_companies", CRM_SCHEMA)
export class Company extends Table {
  @Field("string") declare _id: string;
  @Field("string") declare name: string;
  @Field("string") declare city?: string;
  @CreationTime() @Index() @Field("date") declare createdAt: Date;
  @UpdateTime() @Index() @Field("date") declare updatedAt: Date;
}
export class CompanyModel extends BasicDataModel(Company, "crm_companies") {}

@RegisterTable("crm_contacts", CRM_SCHEMA)
export class Contact extends Table {
  @Field("string") declare _id: string;
  @Field("string") declare name: string;
  @Field("string") declare email: string;
  @Index() @Field("string") declare status: "lead" | "customer";
  @Field("string") @Relation({ to: () => Company }) declare companyId?: string;
  @CreationTime() @Index() @Field("date") declare createdAt: Date;
  @UpdateTime() @Index() @Field("date") declare updatedAt: Date;
}
export class ContactModel extends BasicDataModel(Contact, "crm_contacts") {}
@CreationTime() / @UpdateTime() auto-stamp the dates on insert and update. CRM_SCHEMA is your project's own schema: the second argument of @RegisterTable files each table under it, and the entry file provisions it with RegisterSchema (wired below). The tutorial stays single-tenant — a per-tenant CRM uses the tenant schema and scoped models instead (Multi-tenant data).
Describe the data with DataControllers
A DataController declares, once, what each field is and which operations exist — the table screens and their forms derive from it (Data controller). The DataController factory and its field decorators are AntelopeJS Data API concepts (Data API guide); the DMS-specific parts are the @Column/@Searchable metadata and the TableViewRoutes generators used below — the DMS counterpart of data-api's DefaultRoutes, with each generated route gated by its own permission.
import { Controller } from "@antelopejs/interface-api";
import { DataController, RegisterDataController } from "@antelopejs/interface-data-api";
import {
  Access,
  AccessMode,
  Listable,
  Mandatory,
  ModelReference,
  Optional,
  Sortable,
} from "@antelopejs/interface-data-api/metadata";
import { Model } from "@antelopejs/interface-database-decorators";
import { DefaultDataTypes } from "@antelopejs/interface-dms/base/data-types";
import { Searchable } from "@antelopejs/interface-dms/base/searchable";
import {
  Column,
  Select,
  TableViewRoutes,
} from "@antelopejs/interface-dms/base/table-view";
import { Company, CompanyModel, Contact, ContactModel } from "../db/crm";

@RegisterDataController()
export class companyDataAPI extends DataController(
  Company,
  TableViewRoutes.All,
  Controller("/api/crm/companies"),
) {
  @ModelReference()
  @Model(CompanyModel)
  declare model: CompanyModel;

  @Select()
  @Listable()
  @Access(AccessMode.ReadOnly)
  declare _id: string;

  @Searchable()
  @Select()
  @Listable()
  @Sortable()
  @Column({ name: "Name", type: new DefaultDataTypes.StringType(), filterable: true })
  @Mandatory("new", "edit")
  @Access(AccessMode.ReadWrite)
  declare name: string;

  @Listable()
  @Column({ name: "City", type: new DefaultDataTypes.StringType() })
  @Optional()
  @Access(AccessMode.ReadWrite)
  declare city: string;
}

@RegisterDataController()
export class contactDataAPI extends DataController(
  Contact,
  TableViewRoutes.All,
  Controller("/api/crm/contacts"),
) {
  @ModelReference()
  @Model(ContactModel)
  declare model: ContactModel;

  @Listable()
  @Access(AccessMode.ReadOnly)
  declare _id: string;

  @Searchable()
  @Listable()
  @Sortable()
  @Column({ name: "Name", type: new DefaultDataTypes.StringType(), filterable: true })
  @Mandatory("new", "edit")
  @Access(AccessMode.ReadWrite)
  declare name: string;

  @Searchable()
  @Listable()
  @Column({ name: "Email", type: new DefaultDataTypes.EmailType() })
  @Mandatory("new", "edit")
  @Access(AccessMode.ReadWrite)
  declare email: string;

  @Listable()
  @Column({
    name: "Status",
    type: new DefaultDataTypes.SelectType({
      items: [
        { value: "lead", label: "Lead" },
        { value: "customer", label: "Customer" },
      ],
    }),
    filterable: true,
    defaultValue: "lead",
  })
  @Mandatory("new", "edit")
  @Access(AccessMode.ReadWrite)
  declare status: string;

  @Listable()
  @Column({
    name: "Company",
    type: new DefaultDataTypes.RelationType({
      dataApiController: companyDataAPI,
      keyMapping: { label: "name", value: "_id" },
    }),
  })
  @Optional()
  @Access(AccessMode.ReadWrite)
  declare companyId: string;
}
The RelationType column is the UI side of the relation the schema declared with @Relation: the contact form gets a searchable company picker (served by the company controller's select route), the list shows the company's name instead of a raw id, and — because the company controller has a new route — the picker offers an inline "add company" form to users holding that permission.
@Select() marks the fields that lightweight select route exposes, so only the target of a relation needs it — _id for the picker's value, name for its label. Nothing references contacts, which is why the contact controller declares none.
Register the pages
Pages anchor the screens in the sidebar. A Category groups them under pagesCategory — the sidebar's root Pages group; each TableView points at its controller — columns and forms come from the decorators, not from the page. PageController's first argument is the page id: keep it in mind, the permission ids in the last step derive from it.
import {
  Category,
  PageController,
  RegisterPage,
  pagesCategory,
} from "@antelopejs/interface-dms/page";
import { TableView } from "@antelopejs/interface-dms/base/table-view";
import { companyDataAPI, contactDataAPI } from "../data-api/crm";

export const crm = Category("crm", {
  displayName: "CRM",
  icon: "i-ph-address-book",
  category: pagesCategory,
});

@RegisterPage()
export class CompaniesPage extends PageController("crm-companies", {
  displayName: "Companies",
  icon: "i-ph-buildings",
  category: crm,
  urlSlug: "companies",
}) {
  static table = TableView(companyDataAPI, {
    caption: "Companies",
    labelKey: "name",
    formContainer: { type: "drawer" },
    rowActions: { add: true, edit: true, delete: true, hasSelection: true },
  });
}

@RegisterPage()
export class ContactsPage extends PageController("crm-contacts", {
  displayName: "Contacts",
  icon: "i-ph-users",
  category: crm,
  urlSlug: "contacts",
}) {
  static table = TableView(contactDataAPI, {
    caption: "Contacts",
    labelKey: "name",
    formContainer: { type: "drawer" },
    rowActions: { add: true, edit: true, delete: true, hasSelection: true },
    tabs: [
      {
        id: "leads",
        label: "Leads",
        filter: { accessorKey: "status", value: "lead", mode: "is" },
      },
      {
        id: "customers",
        label: "Customers",
        filter: { accessorKey: "status", value: "customer", mode: "is" },
      },
    ],
  });
}
Two options do quiet work here: labelKey picks the field that identifies a row in container titles (the drawer's title shows the record's name instead of an id), and hasSelection enables row selection.
Wire the entry file: the side-effect imports run the decorators, and start() registers the schema — RegisterSchema reads every table filed under crm and provisions them once the database is up.
import "./db/crm";
import "./data-api/crm";
import "./pages/crm";
import "./routes/crm-stats"; // next step

import { RegisterSchema } from "@antelopejs/interface-database-decorators";
import { CRM_SCHEMA } from "./db/crm";

export async function start(): Promise<void> {
  await RegisterSchema(CRM_SCHEMA);
}
Restart the backend, then the frontend (full-restart, always). The sidebar now shows a CRM group: create a company, then a contact — the company picker, the status tabs, the drawer forms, search, and filters are all there without a line of Vue.
To reproduce the populated screen, create Northstar Studio with city Brussels in CRM → Companies. In CRM → Contacts, use New entry to add the following contacts, select Northstar Studio in each company picker, and save each form:
| Name | Status | Company | |
|---|---|---|---|
| Jamie Lee | [email protected] | Lead | Northstar Studio |
| Priya Shah | [email protected] | Customer | Northstar Studio |
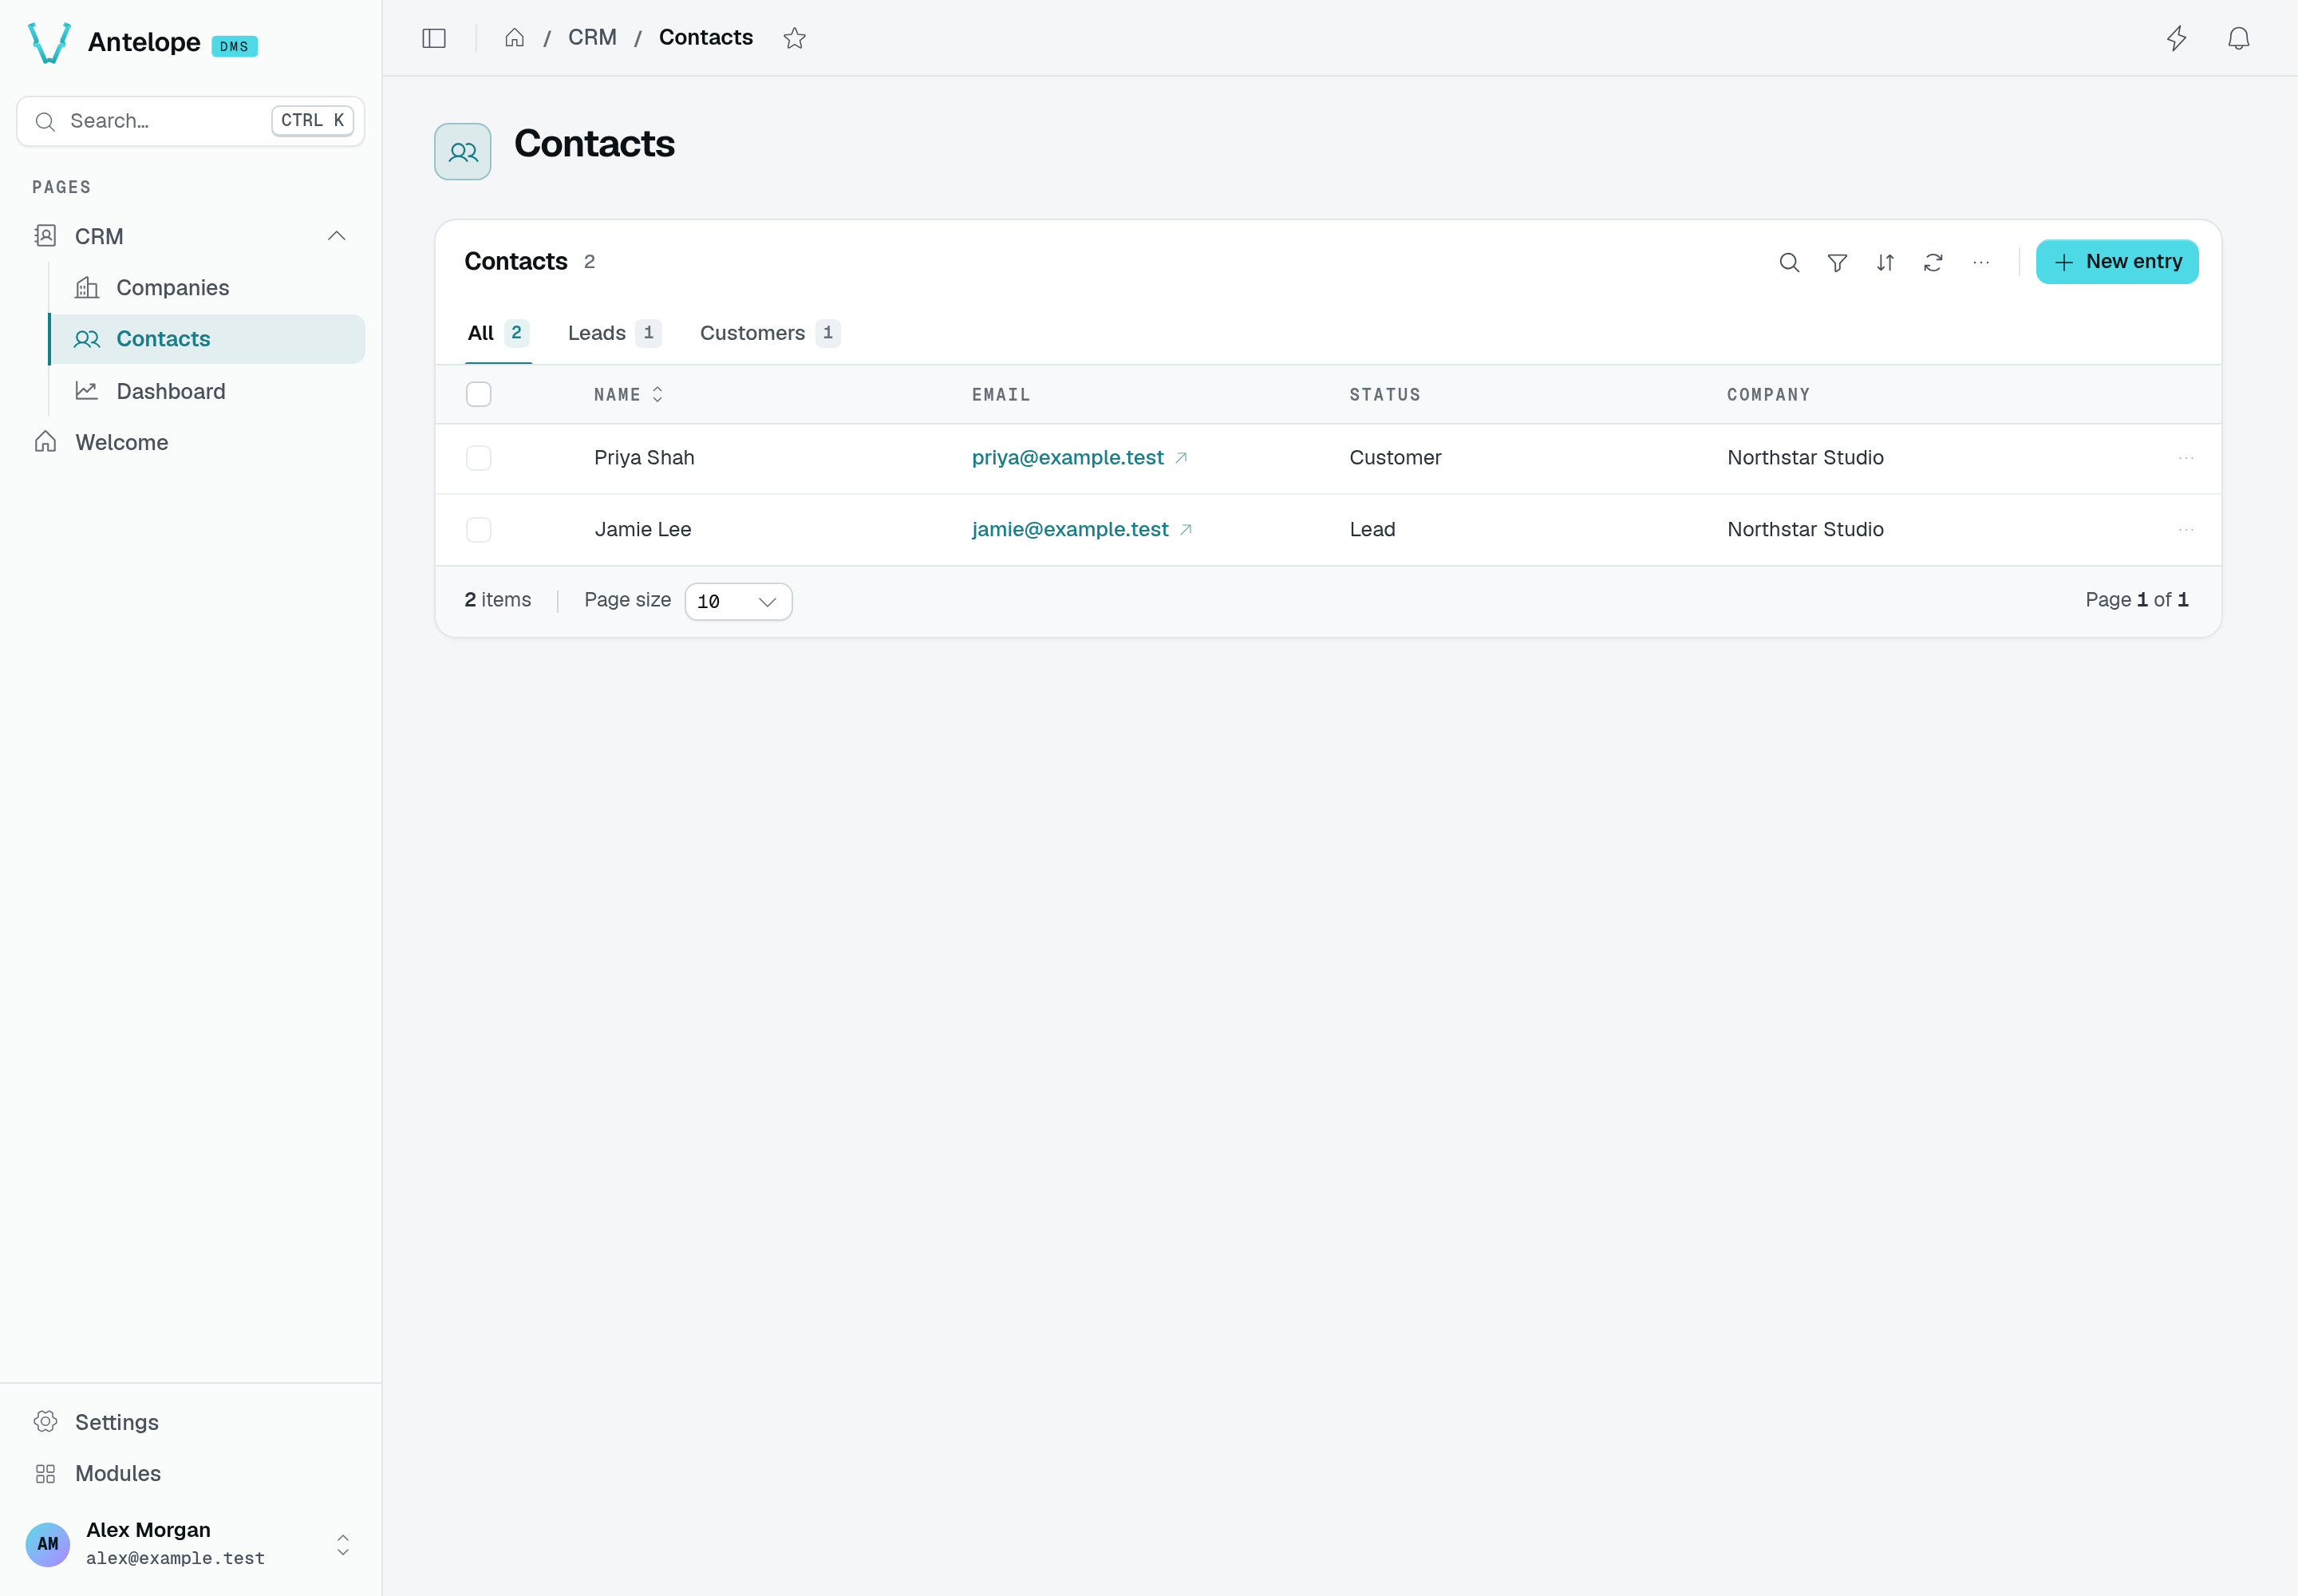
These are saved tutorial records, not the template's seed data: All 2, Leads 1, and Customers 1. The Company column resolves the stored relation to Northstar Studio.
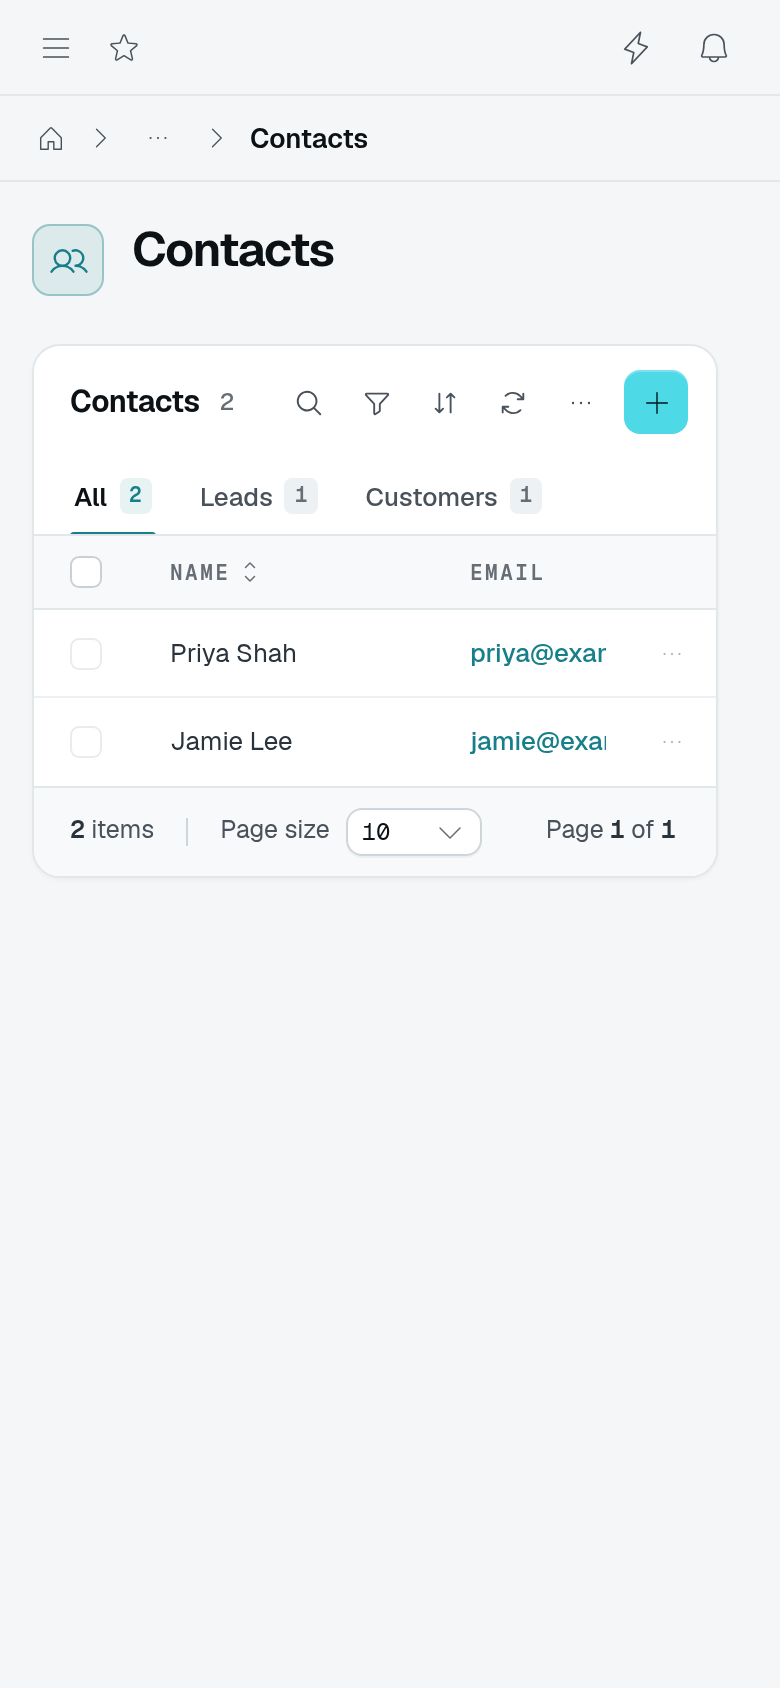
At 390 CSS pixels, the names and tab counts remain visible. Scroll the table horizontally to reach Status and Company; the screenshot shows its initial scroll position.
Add a dashboard
A dashboard is a page composing widgets. The PeriodSelector publishes a date range; the KPI card names it via periodScope and refetches when it changes (Charts & widgets).
First the KPI route — it receives the selector's from/to as query params and answers the KpiCard payload. Guard it with the dashboard page's permission: hiding a widget does not protect a standalone API route. CrmDashboardPage is declared in the next snippet, so add both snippets before restarting.
import { Controller, Get, Parameter } from "@antelopejs/interface-api";
import { Model } from "@antelopejs/interface-database-decorators";
import { AuthUserWithPermission } from "@antelopejs/interface-dms/guards";
import type { User } from "@antelopejs/interface-dms/auth/db";
import { Contact, ContactModel } from "../db/crm";
import { CrmDashboardPage } from "../pages/crm";

export class CrmStatsController extends Controller("/api/crm/stats") {
  @Model(ContactModel)
  declare contacts: ContactModel;

  @Get("new-contacts")
  async newContacts(
    @AuthUserWithPermission(CrmDashboardPage) _user: User,
    @Parameter("from", "query") from?: string,
    @Parameter("to", "query") to?: string,
  ) {
    const start = from ? new Date(from) : new Date(0);
    const end = to ? new Date(to) : new Date();
    const span = end.getTime() - start.getTime();
    const previousStart = new Date(start.getTime() - span);

    // Fine for a tutorial-sized table; index-backed queries for real volumes.
    const all = await this.contacts.getAll();
    const inRange = (c: Contact, a: Date, b: Date) => c.createdAt >= a && c.createdAt <= b;
    const value = all.filter((c) => inRange(c, start, end)).length;
    const previousValue = all.filter((c) => inRange(c, previousStart, start)).length;
    const delta = previousValue === 0 ? 0 : ((value - previousValue) / previousValue) * 100;

    return { value, delta };
  }
}
Then the page — it composes a selector, a grid row, one live KPI card, and a chart running on fixture data so you can see both feeding modes:
import { ChartColumn } from "@antelopejs/interface-dms/base/chart";
import { Grid, GridRow } from "@antelopejs/interface-dms/base/grid";
import { KpiCard } from "@antelopejs/interface-dms/base/kpi-card";
import { PeriodSelector } from "@antelopejs/interface-dms/base/period-selector";

@RegisterPage()
export class CrmDashboardPage extends PageController("crm-dashboard", {
  displayName: "Dashboard",
  icon: "i-ph-chart-line-up",
  category: crm,
  urlSlug: "dashboard",
  order: 0,
}) {
  static period = PeriodSelector({ id: "crm", defaultPreset: "last-30-days" });

  static widgets = Grid({ gap: "1rem" }).child(
    "row",
    GridRow()
      .child(
        "newContacts",
        KpiCard({
          title: "New contacts",
          fetchUrl: "/api/crm/stats/new-contacts",
          periodScope: "crm",
        }),
      )
      .child(
        "pipeline",
        ChartColumn({
          title: "Pipeline (demo data)",
          height: "260px",
          staticDataset: [
            { name: "Deals", data: [12, 19, 8, 24, 15].map((y, i) => ({ x: `W${i + 1}`, y })) },
          ],
        }),
      ),
  );
}
Reload: pick "Last 7 days" in the selector and watch the KPI refetch with the new range while the demo chart stays put. Swapping the chart's staticDataset for a fetchUrl + periodScope is the same pattern as the KPI.
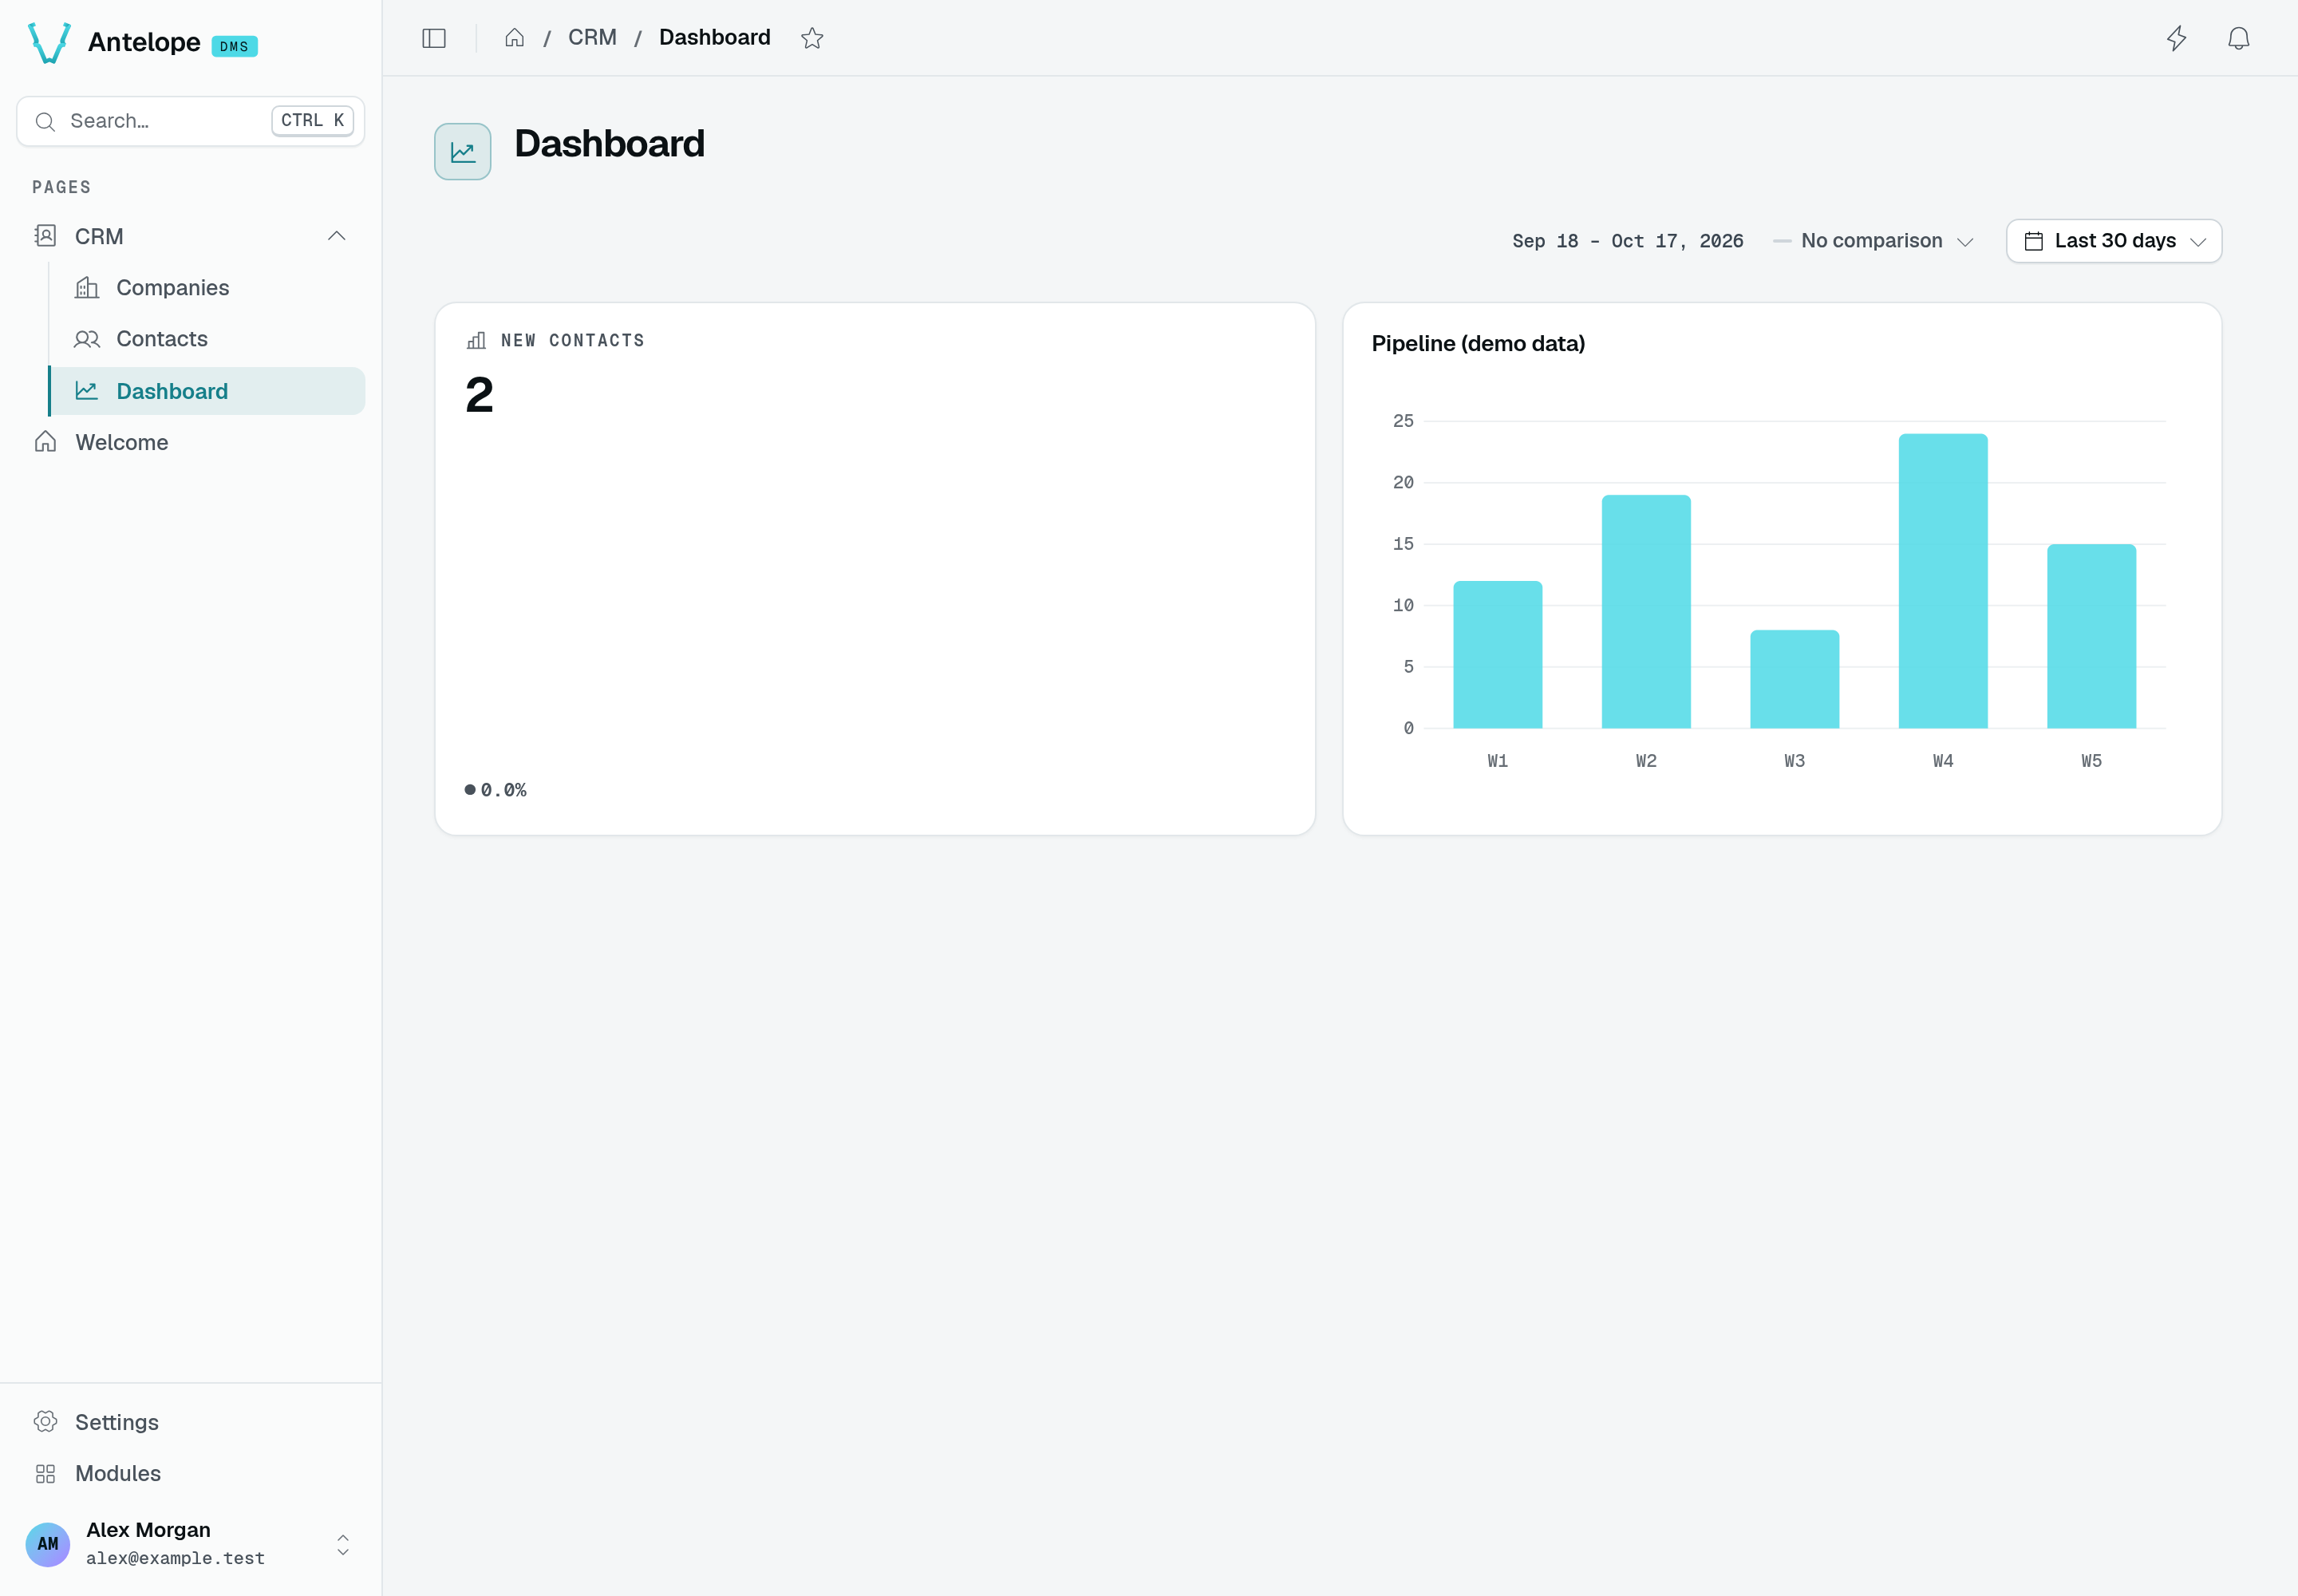
New contacts reads 2 from the two records just saved, with Last 30 days selected. Pipeline (demo data) still uses the snippet's fixed values 12, 19, 8, 24, 15; it does not summarize those contacts. The dates follow the day you run the tutorial, and the example returns a zero delta when the previous period has no contacts.
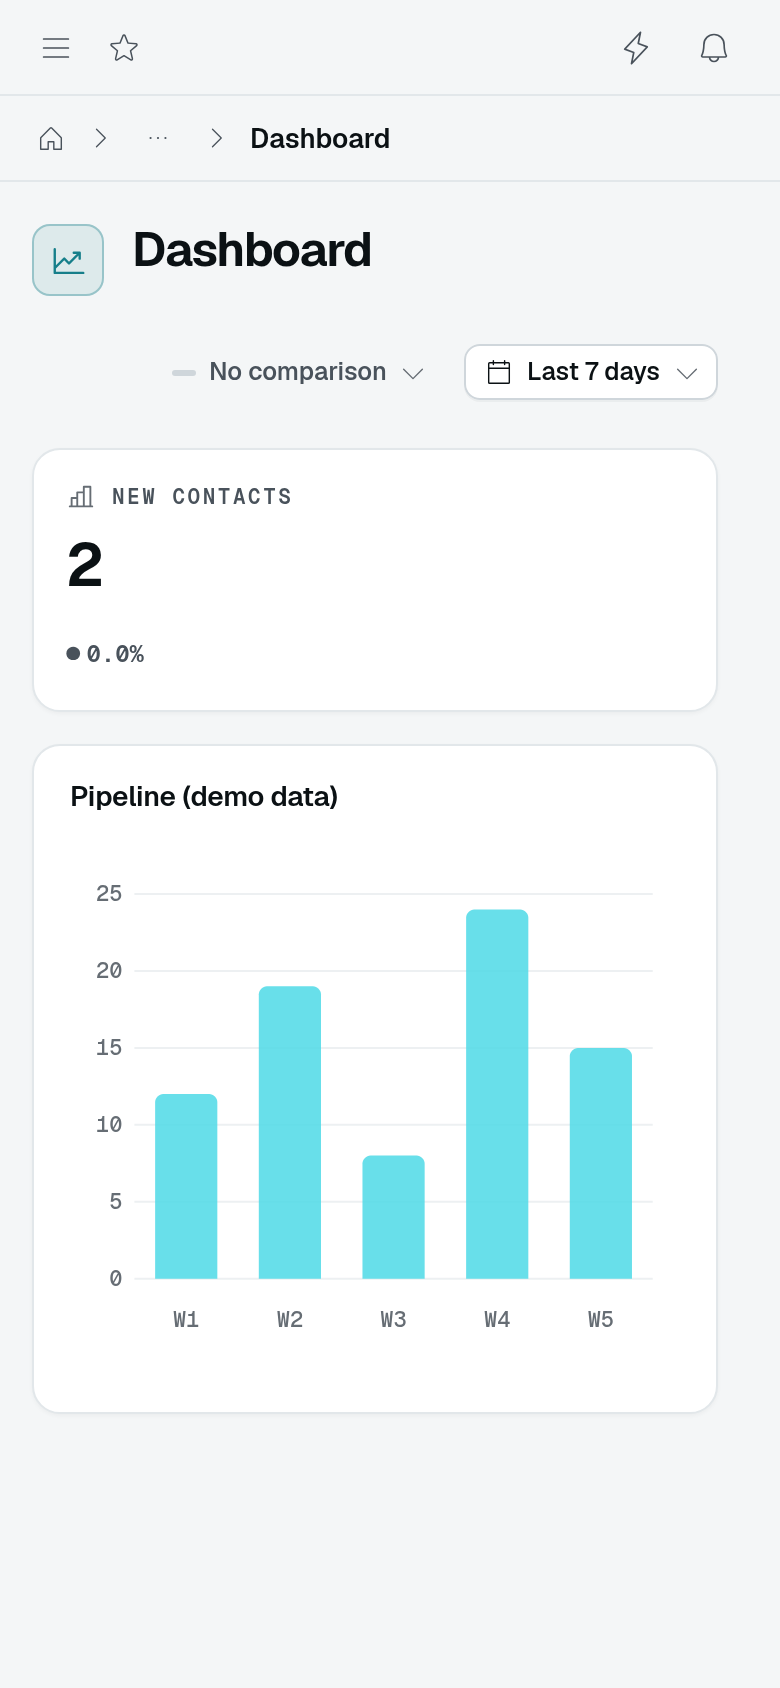
After selecting Last 7 days, the narrow layout stacks the KPI and chart. New contacts remains 2 because both records were created today, and the five demo bars stay unchanged.
Gate it with roles
Everything you registered already produced a permission tree: the CRM pages, each table, and each table action (list, add, edit, delete, …) under ids like pages.crm.crm-contacts.table.delete. Nothing to declare — see for yourself:
interface-email implementation must be loaded — in development, @antelopejs/nodemailer with ethereal: true routes invites to a disposable test inbox (Optional dependencies).- Open Settings → Roles and create a role
Sales. - In its permission tree, expand CRM and grant the contacts page with
list/add/editbut notdelete. - Invite a user from Settings → Members with the
Salesrole (Built-in authentication), then sign in as them.
The Delete entry is gone from the row menu — and the route rejects it server-side too, because the same permission gates both. The full model (id derivation, decorators, standalone permissions) is Auth & permissions.
Where to go next
You have modelled data, derived CRUD screens from it, linked two tables, composed a dashboard driven by a shared period, and scoped it all by role — the workflow behind every DMS feature. From here: