Installation
Start with a working DMS project and a tenant-owner account. By the end of these steps, Edit this page opens a canvas with a block catalog on the left and settings on the right.
Add the module
ajs project modules add @antelopejs/dms-builder
The module needs the @antelopejs/interface-api interface connected for its HTTP routes, and the database and DMS interfaces the project already uses. Version 0.4 requires @antelopejs/dms 0.9 (@antelopejs/interface-dms 0.7) and @antelopejs/dms-frontend 0.6.
Point it at your sources
The builder edits the project it runs in. When the backend's working directory is not the app's source root, set projectRoot:
"dms-builder": {
  source: { type: "package", package: "@antelopejs/dms-builder", version: ">=0.4.0 <1.0.0" },
  config: {
    projectRoot: __dirname,
  },
},
Run the project in development
Start the backend and frontend in separate terminals, from the project directory:
pnpm exec ajs project dev -w
pnpm exec ajs dms dev
Wait for the backend to start before launching the frontend. The builder registers its frontend module only when it is enabled.
Open the editor
Open any DMS page and click Edit this page in the header, or press Ctrl B (⌘ B on macOS).
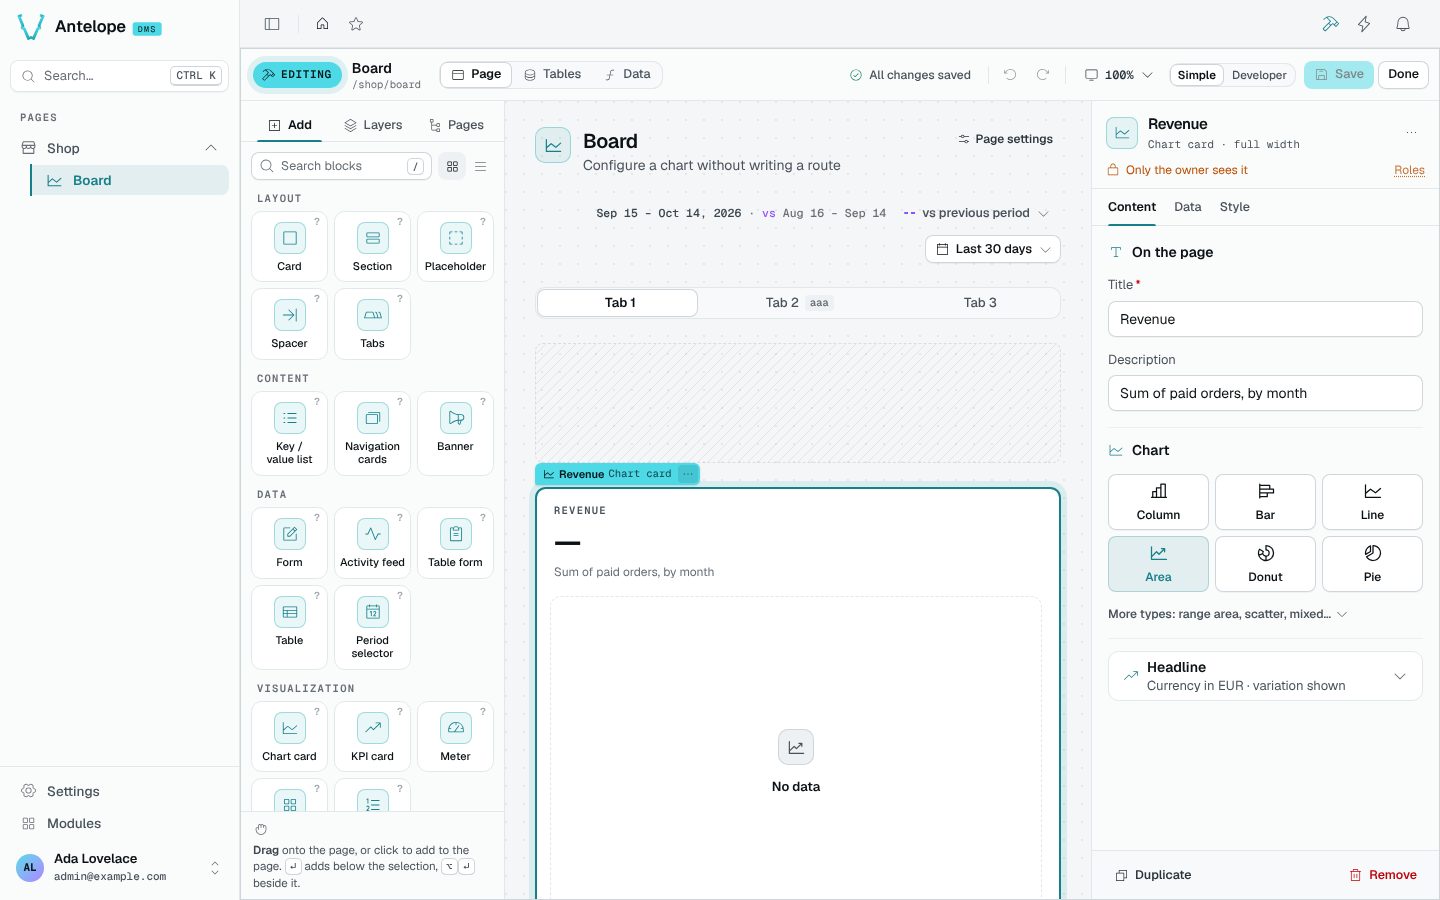
Select a card and change its title to check the preview. Save to write the change, or discard the page draft to leave the source untouched. If the button is missing, check the FAQ before enabling the builder on a production process.
packages/dms-builder/playground) loads the builder with a demo order table and a Board page holding a chart to configure. Run pnpm dev and pnpm frontend:dev there.